Muriuki Njonjo (Class of 2017): Giving back through leadership and empathy
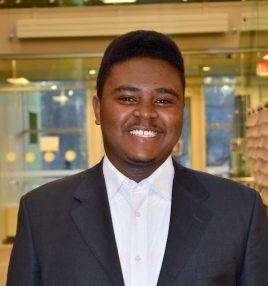
My goal in life has always been to be the very best version of myself that I can be. From the time I joined the Aga Khan Academy Mombasa for my International Baccalaureate (IB) Diploma Programme to when I graduated, that was the greatest period of personal growth in my life. The Academy changed my way of thinking, my way of doing things and informed my purpose in life.
Through a strong emphasis on the intrinsic value of education, the Academy had a lasting impact on me. I remember fondly living in residences which undoubtedly prepared me for living away from home in university. Residential life helped form bonds of friendship that I can confidently say will last a lifetime. The wisdom of dorm parents like Mr. Dudi and Mr. Prashant always helped me get through the rough tides of the IB Diploma Programme, and their words are still very much applicable to my daily life today.
In many ways, the Academy added great intrinsic value to me. However, there was more to that. The Academy demands of all its students a contribution. We lived in a space where we all felt we had to bring something to the table to the benefit of the larger community. It was in this sense of collective responsibility that I found my niche as an active member of the AKA Mombasa community. I was privileged to serve the Student Council as Secretary of the Finance Committee, a role that made me a steward of the student body’s finances. Alongside my committee, I approved the allocation of roughly US$1000 towards various service projects organised by students which had an impact on the local Mombasa community. The importance of giving back and empowering the less fortunate is built into the very fabric of the Academy’s mission and that helped me develop a profound sense of empathy.
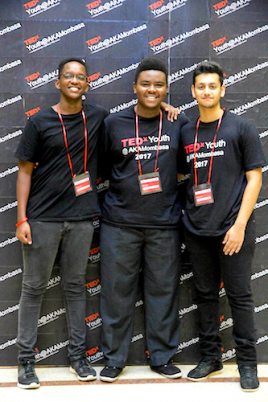
I had the opportunity to establish a service club known as the Leo Club with the help of the local Lions Club. We went ahead to raise money for corneal transplants. With the help of my mentors Adnan and Aalia Visram, I co-founded the Academy’s first ever TEDxYouth event with my friend Preyansh Kaushik. Through TEDx we provided an incredible platform for members of our AKA Mombasa community to share their unique perspectives with millions of people across the world. TEDxYouth@AKAMombasa remains one of my proudest achievements at the Academy. Alongside my friend Inaara Savani and the constant guidance and support of Ms Alex Holland, I organised a workshop for Year 9 students on the Syrian refugee crisis. This opportunity eventually led me to Uganda in the Summer of 2016, where I volunteered as an English teacher at the Kyangwali Refugee Settlement. I was also honoured to be the Finance Executive of the CanCare club which organises the Academy’s annual blood drive. All these incredible opportunities have taught me valuable skills and have made me a driven person. Of course, all this would not have been possible without the support of my peers and faculty members.
One cannot speak about their time at the Academy without mentioning the rigorous academics geared towards creating critical, analytical and reflective thinkers. It’s through Mr. Vlad’s classes that I discovered my passion for politics because of the power it has to effect change in everyone’s lives. The strength of the curriculum and the way the teachers delivered it definitely prepared me for university workload. This combined with the numerous opportunities to get involved afforded to me ultimately won me a full scholarship to the University of Waterloo in Canada where I am currently majoring in political science and financial economics with Honours.
I still carry the spirit of AKA Mombasa with me. Since joining Waterloo, I have been involved in the organisation of the annual TEDx event, I have delivered a start-up pitch for funding at Velocity, the world’s largest free business incubator, and I have been privileged to join the first incorporated blockchain community management firm in North America as the Head of Public Relations. For now, I will continue to do what the Academy taught me to do best: contribute to my community and live out my potential in my truest self. In future I hope to go back home to Kenya and use my education and skills to help make a difference in people’s lives. Until then, I continue to live in a permanent space of gratitude for the person I am today, which I owe to the Aga Khan Academy Mombasa.
Maryam: Becoming a better teacher
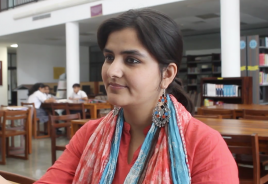
The Teacher Preparation Programme (TPP) is one of the Aga Khan Academies’ landmark teacher development initiatives. In this interview with Kamini Menon at the Aga Khan Academy Hyderabad, TPP participant Maryam talks about the TPP’s unique aspects and her experience with the programme.
Please tell us a little bit about your background.
I’m a part of the Teacher Preparation Programme in Hyderabad. This is my fifth year in teaching, and previously I worked for a Teach for India school in Delhi teaching 48 amazing girls. When my fellowship with Teach for India was over, I applied to the Academy, and here I am.
What made you join the Academy and inspired you to come here?
My previous experience as a Teach for India Fellow made me feel like I wanted to something more than just being a teacher. So I was looking for an option post-fellowship that shared a similar mindset or similar values. When I read about the Academies, the vision really interested me as well as the whole inclusive policy: giving a chance to anyone coming from any background and making sure that we provide them this idea of excellence in education. That was something that really inspired me, and so I joined the Academy.
Talk about the Teacher Preparation Programme (TPP) and where you are in that journey.
The Teacher Preparation Programme is the initiative of the Academies to make sure that we have home-grown teachers who become IB educators. This is a great initiative. This is my ninth month into the programme, and I teach in a classroom, I research, and do a lot of things at the same time. I am getting mentored by experts and improving my pedagogy every day.
Can you explain the structure of TPP? How it is organised and what does it involve?
The programme is an intense 18-month long process, and you do things in phases. In Phase One, we were in a classroom, paired with a mentor, teaching 20% of the time. Now, we are in Phase Two, and I have to teach 50% of my time in a classroom. But it’s not just the teaching. We also have to write an action research paper, which is crucial to the whole programme. Another thing which is important is the Problem-Based Learning Sessions, which are a great way to reflect on who you are as a person, not just as a teacher. In these sessions, we meet three times in a week, and we bring together all our research findings and what we have collected, and we progress to the next learning target. We work on this in groups, and then we get to reflect and apply that in a classroom at the same time.
Can you share two aspects of the programme that you find particularly unique or helpful?
For me, the most interesting part was problem-based learning. It takes a lot of patience to think in a broader way about a problem. The problem sets are given to us – then you create your learning targets, and the whole group researches with different objectives. That makes you really responsible, that improves your research skills. At the same time, it teaches you how to collaborate with members of the group. Another part that I find really interesting and at the same time challenging is my action research piece. It’s not just research; the action part is the most challenging part because you have to reflect on your own practice. For example, I am doing something on inquiry right now, but it’s not just inquiry – it’s “why inquiry in an IB classroom?” or “why even think of those big theories?” So, this has made me more reflective, it has made me more thorough with my work. At the same time, if and when I fail, it’s alright to seek advice and it’s alright to go back to my mentor to ask why this did not work in a classroom. Both problem-based research and the action research, I find that these are pushing me to become a better teacher.
How would you evaluate the model of mentorship that’s in place within the TPP?
Sandra is our mentor, and she is a really experienced Ontario teacher. She has streamlined the programme, she gave it more structure and depth. When you work with Sandra, you are not intimidated by her. You are working with an expert who knows so much, but at the same time she gives you a chance to really apply yourself. She is a mentor for me when I am doing anything in the classroom – she is always providing me with constant feedback on my pedagogy and on my action research paper. Even in the intense Problem-Based Learning Sessions, where it gets a little crazy at times, Sandra is always there to nudge you in the right direction so you come to a conclusion.
How do you and your colleagues in the TPP work together and collaborate?
We are a very diverse group. Sitting with all of them has made me a better teacher in so many ways. It is not easy to admit sometimes that you don’t know things, but I get to learn from these people because their experience, our discussions, and the help we give each other is really great. We also collaborate outside the classroom – for example, if I have a doubt or find something challenging, I go to one of these colleagues and ask for their help. They are always there for me. We really push each other to reflect, to ask the right questions, which makes you think.
Can you talk more about the process of reflection that you have in your TPP group?
For us, reflection is about making yourself vulnerable in front of the whole group. It is not easy – it is not at all easy. We don’t reflect on a superficial level; we have to really apply ourselves in the entire process. When create our reflections, we have to share them with the whole group – and the group knows and understands who you are and gives you feedback. They push you to think along certain lines, and our mentors force us to think about the way we think – it becomes more about metacognition. The whole idea of learning from someone is that you have to be vulnerable and sometimes even fail, and then admit that you failed. When you draft that experience into a reflection, it makes you a better teacher. And definitely a better person.
How do you think the TPP has made you a better person in actual fact?
The way the TPP is designed, you become a reflective practitioner – that’s the goal! You teach in a classroom and you know that it’s not just a physical space, it’s much more than that. You cannot teach in isolation – you have to collaborate with other people, you have to go and ask for help. At the culmination, you really will become a better teacher. It’s a rigorous process, it’s an intense process, it’s a very reflective process. But the goal is that, ultimately, you will be the kind of teacher you want to be as well as an effective teacher.
Can you give us an example of how you’ve applied something you’ve learnt through the TPP in a classroom setting?
Right now, I am doing an action research, and a huge chunk of this is based on inquiry-based learning in a classroom. I’m teaching grade 6, and the unit I was dealing with was “did they live like us?” It is a lot about civilisations and the way people lived and interacted with their environment. All the research that I did during the Problem-Based Learning Sessions and my action research, I applied it in this classroom setting. I created the lesson plan and then got the feedback from my mentors. Then it gave me a chance to reflect on my practice: sometimes I tend to go a little overboard, and I got to see if my plan would work out. This is how you become a better teacher.
Is there anything else that you’d like to add about the TPP?
I’ll say, for the whole process, you have to be very open. You have to be open-minded to get into this process. It’s not easy just to acknowledge that you’re going though 18 months of training – you might feel intimated, or that your prior experience doesn’t matter. But that’s not the point. The point is to become a better teacher. If that is your goal, then this programme will work for you. The way this programme is designed is rigorous and beautiful. The most important point depends on you: what do you want to take away from this. And there is a lot, if you are really open to exploring.
Drupal How To
Table of content
Apply a style to the main text
Index a page for search engines
Insert an "Article of interest"
Edit an existing photo gallery caption
Create a page that does not appear in the main menu but can be linked from another page
How to modify a video on a home page
Edit user roles and permissions
How to add new content
Click on the "Content" tab in the top navigation bar and then click on "Add Content".
On the page listing the different content types, click on "Basic page".
Fill the following fields:
Panoramic image: enter a panoramic image (576 x 210px, with rounded corners).
Body: This is the page main content, starting below the panoramic image and the page title. To edit this content content, go into the "Body" field. Make sure the Text format is set to "Full HTML" in the drop-down below the "Body" field. To apply the defined style to titles, highlight the title text and select "Heading 2" in the "Format" drop-down menu. Next to the "Body" field name, you can click on the "Edit summary" link to enter a summary for the page. This summary will be used to index the page. If you are pasting content from Word in the "Body" field, please use the "Paste from Word" icon: this will remove extra formatting to keep the text in plain Arial.
Academy name: Select under what Academy this page should appear.
In the bottom left list of links, click on "Menu settings". Check the "Provide a menu link" box. In the "Parent item", select the appropriate Academy section under the relevant Academy name.
In the bottom left list of links, click on "URL path settings". Uncheck “Generate automatic URL alias”. Then, in the “URL alias field”, enter a URL that starts with "general" for General Academies or that starts with the individual Academy name (for instance: "maputo/our-campus").
Click "Save" at the bottom of the page.
The new content will appear in the selected Academy section. If it is not in the right place, go to "Structure" in the top black navigation, then "Menu". Next to the Academy name, click "List links". Find the page you just created and use the handles to re-arrange the order. Please note that this uses a tree structure with different levels. Use the handles to put the page in the right section and order.
Log into the website Admin with your own account.
Once logged in, click on the"Admin list" menu in the top black menu.
Select the page you want to edit: you can filter the pages displayed by selecting a page "Type" or a "Taxonomy term" (recommended) from the drop-down menus. For instance, if you want to edit a page for Mombasa, select "Mombasa" in the "Has taxonomy term", and click on "Apply". This will list all pages for Mombasa. To access the page and edit it, click on the "Edit" link next to the page title.
This opens a page showing the various elements of the page, separated in various fields:
Panoramic image: this is the panoramic image going at the top of the page. If you want to delete the image, click on the "Remove" button.
Title: This is the page title.
Body: This is the page main content, starting below the panoramic image and the page title. To edit this content content, go into the "Body" field. Make sure the Text format is set to "Full HTML" in the drop-down below the "Body" field. To apply the defined style to titles, highlight the title text and select "Heading 2" in the "Format" drop-down menu. Next to the "Body" field name, you can click on the "Edit summary" link to enter a summary for the page. This summary will be used to index the page. If you are pasting content from Word in the "Body" field, please use the "Paste from Word" icon: this will remove extra formatting to keep the text in plain Arial.
Academy name: Select under what Academy this page should appear.
Click "Save" at the bottom of the page.
Apply a style
Select the text that you want to style. In the "Styles" drop-down menu, select the style you need.
Intro: grey italic text at the top of the page.
Quote: format for quote text.
Author: format for quote author text.
Click "Save" at the bottom of the page.
Insert a quote
Quotes can be added on pages that have a long text. On short pages, the use of quotes will alter the design of the page.
Go on the "Admin list" menu in the top black menu and open the page that should be indexed with the "Edit" link.
Type the text and the author in the same line, at the beginning of the paragraph where the quote should appear. If you are pasting content from Word in the "Body" field, please use the "Paste from Word" icon: this will remove extra formatting to keep the text in plain Arial.
Highlight the text of the quote and in the "Styles" drop-down menu, select "Quote".
Highlight the author of the quote and in the "Styles" drop-down menu, select "Author".
This will move the quote block to the left of the text.
Click "Save" at the bottom of the page.
Display issues: if the rendering looks wrong, check the source code (by clicking on "Disable rich-text" below the "Body" textarea). The quote formatting tags must be placed straight after the "<p>", and the closing "</p>" tag will be at the end of the paragraph of text. This is what the code should look like (any extra tag can be deleted):
<p><span class="quote">“Quote comes here.”</span><span class="author">Author comes here</span>Beginning of the paragraph comes here... </p>
Click on the "Content" tab in the top navigation bar and then click on "Add Content".
On the page listing the different content types, click on "Article".
Fill the following fields:
Title: enter the article title.
Image summary: upload an image that will be displayed next to the article summary, on the general "News" page.
Body: in the "Text format" drop-down menu, select "Full HTML". Enter your text in the "Body" field. If you are pasting content from Word in the "Body" field, please use the "Paste from Word" icon: this will remove extra formatting to keep the text in plain Arial. To apply the defined style to titles, highlight the title text and select "Heading 2" in the "Format" drop-down menu.
To insert an image in the article, place the cursor where the image needs to be added. Click the "Add media" icon (last one in the toolbar). Select the image you want to insert, with the browse button. Click "Submit". In the "Current format is" drop-down menu, select "Large". Enter a short photo caption in the "Description" field.
To add a page Summary that will be used by the News page listing various articles (and also by search engines), click on "Edit summary", next to "Body", and type in a summary.
Academy name: select an Academy name. If the news is a general one, select "General".
Date: enter the Article date, following the right format (mm/dd/yyyy).
In the bottom left list of links, click on "Menu settings". Check the "Provide a menu link" box. In the "Parent item", select "News" under the relevant Academy name.
Click "Save" at the bottom of the page.
How to index a page for search engines
For a good search engine indexing, page titles and description should be unique
Go on the "Admin list" menu in the top black menu and open the page that should be indexed with the "Edit" link.
In the page edit window, go at the bottom and click on the "Meta tags" link in the left column.
Description: By default, the description meta tag will be the summary used in the "Body" field. To edit the Summary, click the link next to the "Body" field title.
Keywords: enter a list of keywords
Title: By default, this will use the page title, a pipe sign and the general title "Aga Khan Academies".
Click "Save" at the bottom of the page.
Update a school calendar
Go on the "Admin list" menu in the top black menu and open the page that should be indexed with the "Edit" link.
Modify the text as needed. Make sure there is no empty space at the beginning of the cell by pressing the "Back" key. If empty spaces are left, the text will not be aligned properly. If you are pasting content from Word in the "Body" field, please use the "Paste from Word" icon: this will remove extra formatting to keep the text in plain Arial.
If you need to remove a row, place your cursor on the row and click the "Delete row" icon in the "Body" toobar (icon showing 2 white rows and a red row in between).
If you need to add a row, place your curor where you want to add the row and click the "Insert row before" or "Insert row after" icons in the "Body" toolbar (icons showing 2 white rows and a blue row above or after).
To add a month name, insert a row, hit return to create an empty line above the month name (so that it is not too close to the previous month) and type the month name. Highlight the month name and select "Heading 3" in the "Paragrah" drop-down menu, to apply a bold style and bigger typeface.
Click "Save" at the bottom of the page.
Edit drop-down menu text
In the top black navigation, click on "Structure" and then "Menu".
Next to the Academy menu you want to modify, click on "List links".
Next to the link you want to modify, click on "Edit".
Edit the "Menu link title" field as needed. Please keep the title short.
Click "Save" at the bottom of the page.
Insert an "Articles of interest"
In the top black navigation, go on "Content" and click "Add content".
Fill the following fields:
Title: enter the article title.
Body: This is the page main content, starting below the panoramic image and the page title. To edit this content content, go into the "Body" field. Make sure the Text format is set to "Full HTML" in the drop-down below the "Body" field. To apply the defined style to titles, highlight the title text and select "Heading 2" in the "Format" drop-down menu. Next to the "Body" field name, you can click on the "Edit summary" link to enter a summary for the page. This summary will be used to index the page. If you are pasting content from Word in the "Body" field, please use the "Paste from Word" icon: this will remove extra formatting to keep the text in plain Arial.
Image insertion in the body text: Place the cursor at the beginning of the paragraph where you want to place the image. Click on the "Add media" icon in the toolbar (far right). Upload the image (or select it from the "Library" tab if it already exists). Once uploaded, in the "Current format" drop-down menu, select "Preview". In "Description", enter the image caption. Click on "Submit". To add a caption, enter the caption text between the image and the first letter of the paragraph. Then select the caption only and in the "Styles" drop-down menu, select "Caption".
Newsletter reference: Enter the newsletter reference in the format "Newsletter n°1". This will be used to group the articles under the same article. Therefore it is important to have the reference written consistently.
Academy name: Select the Academy relating to the article.
In the bottom left list of links, click on "Menu settings". Check the "Provide a menu link" box. In the "Parent item", select "Articles of interest" under "<Main Menu>/News & Publications".
Click "Save" at the bottom of the page.
Click on "Content" in the Admin toolbar.
Click on "Add content > Gallery".
Enter a title and a description for the photo gallery (these will be used by search engines).
Select the number of columns ("4" in our case) and number of rows (this can be modified later).
Uncheck "Allow downloading of the original image", "Show media on a full page" and "Show title and description". Only "Show media in a lighbox" should be checked.
In "Academy name", select the relevant Academy.
In "Menu settings" (at the bottom, in the vertical menu), click on "Provide a menu link" and then link the gallery to the website (with "Parent item").
Click on "Save".
This opens the photo gallery page. To add images, click on the "Add media" link. Upload or select images from the Library.
The images uploaded or selected from the Library will appear on the page. To edit them, put your mouse on the image top right corner and click on the arrow to edit. You can then modify the title, description, etc.
Add as many images as necessary.
To edit an existing gallery, log in as an Admin and click on the top left "Home" icon in the toolbar. Go on the gallery page. As an Admin, this will give you access to the "Add media" link and the different edition tabs above the gallery.
Edit an existing photo gallery caption
Once logged in as an Administrator, go on the gallery web page (through the actual website, not through the "Admin list" or "Content" list - to access the website, click on the "Home" icon in the top left black navigation). Above the thumbnail images, click on the "Edit media" tab. Update the captions as needed.
Go on the "Admin list".
In the "Type" dropdown menu, select "Slideshow home" and click "Apply".
Click on the "Edit" link next to the slide you want to update.
Panoramic image: Leave as it is for an existing image, or replacing it with a new one if it needs to be changed. The image should be 940 x 360px, with rounded corners (20px radius in Photoshop). When cropping the image, bear in mind that the caption will come as an overlay on the image, and therefore make sure it is fine to have the right part of the image slightly hidden.
Title: This is the title that will appear above the caption, in upper and lower case. Keep it short.
Caption: This is the caption text. Keep it short.
Link text: This will be clicked to move to the next page. Square brackets will be added automatically. Therefore, simply type "Find out more".
Node reference: This is the page that will be called once the visitor clicks on "Find out more". Start typing the page title. Once it appears, highlight it to select it. When a title is correctly selected, it will appear in the "Node reference" box with its Node ID (ex: "introduction [nid:2]").
Taxonomy family: Link the slide to a general Academy or a specific one.
The rest of the form should not be modified.
Click on the top left "Home" icon to access the website.
Place your mouse over the footer column that you want to modify until you see the wheel icon and the arrow (at the right of the footer title).
Click on the arrow and select "Configure".
This opens the form where you can modify the information. You can modify "Block title", "Block description" and "Block body". Please do not change the other parameters.
Click "Save" at the bottom of the page.
The basic table html code should look like this:
<table>
<tr>
<td><strong>Title 1st column in bold</strong></td>
<td><strong>Title 2nd column in bold</strong></td>
</tr>
<tr>
<td>Text first column</td>
<td>Text second column</td>
</tr>
<tr>
<td><br /><strong>Second title 1st column in bold with visual space added above the line</strong></td>
<td><br /><strong>Second title 2nd column in bold with visual space added above the line</strong></td>
</tr>
</table>
Notes:
- <table></table>: tags that start and end the table
- <tr></tr>: tags that start and end the row
- <td></td>: tags that start and end the cell
- Put titles only in bold (wrapping the title between <strong></strong> tags).
- To avoid inserting blank cells/rows, simply add a <br /> tag to create an empty line above a title: this will add a blank line but will avoid creating an empty row or cell above this title.
- To modify the column width, update the top column cell as follows: <td width="50%"> or <td width="200px">
Click on the "Content" tab in the Admin toolbar.
Click on "Add content > Newsletter".
Fill the form as follows:
Title: title of the newsletter.
Language: select "English".
Body: enter a summary for the newsletter.
Image thumbnail: upload a thumbnail for the newsletter (172 pixels wide image).
Academy name: select the relevant Academy name.
File: upload the newsletter PDF.
Newsletter type: select the newsletter type under which the newsletter will appear on the Newsletters page.
Date: select the newsletter date.
Leave the other fields blank.
Create a new newsletter type
Newsletter types are generated using Drupal taxonomy: each newletter type is a term (for instance "MUN Journal"), linked to a "Vocabulary" (in this case "Newsletters").
To add a newsletter type, click on "Structure" in the top navigation.
Click on the "Taxonomy" link.
On the "Newsletters" line, click on the "Add terms" link.
In the form, enter the name of your new newsletter type.
Leave the other fields as they are and click on "Save".
When you create or edit a newsletter, the new term will appear in the "Newsletter type" drop-down.
Insert a large side picture
Large side picture can be applied on long pages. On short pages, use the thumbnail images.
Prepare the image so that it is 374px wide. Height is flexible. Apply a Photoshop 20px radius to the top and bottom right corners.
Insert the image within the text, at the beginning of a paragraph, low enough so that it does not overwrite the top left navigation.
In "Full html" mode, click on "Disable rich-text" to access the html code. Locate the image tag and modify the class so that it reads class="large-image..." (only the "image" class should be modified - leave the rest as it is).
Check the page to make sure the photo does not overwrite the menu and is not too high or too low on the page. If it is, go in source mode, select the entire image tag and move it to a different location.
Create a page that does not appear in the main menu but can be linked from another page
Click on the "Content" tab in the Admin toolbar.
Click on "Add content" and select a content type (for instance "Basic page").
Enter a "Title" and a "Body" text.
Select an Academy.
In the bottom left menu, under "Menu settings", make sure "Provide a menu link" is unchecked.
In "URL path settings", uncheck “Generate automatic URL alias”. Then, in the URL alias, type a URL for that page (in lower case, with no spaces), including the Academy name (for instance “maputo/dummy-page”).
Click on "Save".
Use the URL that was entered in "URL path settings" to create a link to this page (ex: "maputo/dummy-page").
How to edit a webform
Go on the "Admin list" tab in the top navigation.
Select the content type "Webform" to display all webforms.
Edit the webform you want to modify.
The page will display several tabs in the top right corner. The "Edit" one allows you to update the form title and introduction/body text, when they exist.
Make your modifications to the "Edit" page and click "Save".
If you need to update the form itself, click on the "Webform" tab (in the top right corner). This will display the various existing fields. To edit them, click on the "Edit" link.
To modify the e-mail address of the recipient, go on "Webform" and click on the "E-mails" link below the top right tabs. Click on the "Edit" link to modify the e-mail.
How to post a video
Have the video uploaded on the Brightcove video server (Ayaz to upload the video for you).
Once the video is uploaded, get the "Quick publish" code (Ayaz to provide you with it).
In Drupal, click on the "Content" tab and add a new "Video" content type.
Fill the form as follows:
Title: enter a title for the video.
Academy name: select the Academy name for the video.
Video code: paste the code provided by Brightcove. Make sure the "Text format" is set up to "Code". It should look like this:
<div style="display:none">Video presented by the Aga Khan Academies</div>
<script language="JavaScript" type="text/javascript" src="https://www.agakhanacademies.org/%3Ca%20href%3D"http://admin.brightcove.com/js/BrightcoveExperiences.js">http://admin.brightcove.com/js/BrightcoveExperiences.js"></script>
<object id="myExperience1715924728001" class="BrightcoveExperience">
<param name="bgcolor" value="#FFFFFF" />
<param name="width" value="340" />
<param name="height" value="190" />
<param name="playerID" value="648717932001" />
<param name="playerKey" value="AQ~~,AAAAlwpybYk~,Oor7wWdAhP7InRlo2x7X9FBFx6m9DFZ_" />
<param name="isVid" value="true" />
<param name="isUI" value="true" />
<param name="dynamicStreaming" value="true" />
<param name="@videoPlayer" value="1715924728001" />
</object>
Important notes on the video code:
- The original code provided by Brightcove contains adverstising and extra tags which we don't need. You can delete them to get the same structure as indicated above.
- The above code is a sample: each video has a unique reference. When inserting a new video, some of the param <param> values below will be replaced with the new video's ones. Dimensions and background color should stay as above.
- In the code below, you will need to replace the "Video presented by..." text so that it features "Aga Khan Academies" (the code sent from Brightcove may indicate "AKDN").
Date: select the video date.
Leave the other fields as they are by default.
Click on "Save".
How to modify a video on a home page
Click on the "Home" icon in the top black navigation bar. Go to the page where you want to edit the video. Place your mouse over the top right corner of the block that contains the video and click on "Configure block".
In the "Block body" field, modify the code as per instructions on "How to post a video". Make sure the "Text format" is set up to "Code".
Leave the other fields as they are by default.
Click on "Save block".
Edit User roles and permissions
The management of the user roles and permissions has serious security implications. It is possible to access the settings for the Admin and the Master Editors.
Create a new user:
In the top navigation, click on the "People" tab.
Click on "Add user".
Enter a user name and an e-mail address (all e-mail addresses need to be unique - this address will be used to send an invitation to the new user).
Enter a strong password and confirm it.
Check "Active" for the "Status".
In the "Roles" list, select the role for the new user (each "Role" has specific persmissions).
Check the "Notify user of new account" so that the new user receives an invitation to activate account.
Click on "Create new account".
Edit an existing user:
In the top navigation, click on the "People" tab.
Click on the "Edit" link for the User you want to modify, in the right column.
Modify the User name or e-mail address.
Please note that the "Password" will be blank for security reasons.
In the "Roles" list, select the role for the new user (each "Role" has specific persmissions).
Click on "Save".
Edit the "Permissions":
Permissions let you control what users can do and see on your site. You can define a specific set of permissions for each role.
In the top navigation, click on the "People" tab.
In the top right corner, click on "Permissions".
This will display a list of all permissions for the admin and content of the website.
The "Administrator" role should be able to do everything.
The "Master Editor" should be able to do everything, apart from manipulating views and the website structure itself.
The other roles should have limited permissions.
To add a permission, check the checkbox on the permission line you are interested in.
Define "Roles":
Permissions let you control what users can do and see on your site. You can define a specific set of permissions for each role.
In the top navigation, click on the "People" tab.
In the top right corner, click on "Roles".
Edit an existing role by clicking on "Edit role" or "Edit permissions" on the line of the Role you are interested in.
If you need to create a new role, type a name for that role in the bottom field and click "Add role". This should be used if you want to create a role to modify only spotlights, for instance.
Once a role is created, set up its permissions.
Click on "Save".